

How to do a Fireplace Makeover
I was tired of looking at our 90’s fireplace and decided to do a fireplace makeover. Follow my DIY shiplap with faux beam tutorial to update your fireplace!

When we moved into our home I first noticed the blond 90’s fireplace and really felt like we needed to do a fireplace makeover. I thought I would just simply paint it white, throw some plants on it and call it good.
Well, while I was painting the fireplace I noticed that the mantle was pretty loose and could easily be pulled off of the wall. In my curiosity I pulled the mantle a bit and it came completely off the wall! This got me thinking of what else I could do with the fireplace makeover.
Steps to follow for your DIY shiplap fireplace makeover
- Step one: Create the space for your makeover. Take down old material
- Step two: Build the frame
- Step three: Install the shiplap boards
- Step four: Add trim along the top
- Step five: Spackle and sand
- Step six: Paint
- Step Seven: Attach a support board and mantel
Can I do a shiplap fireplace using an electric insert?
Yes! You can follow our steps where you don’t have a fireplace. Just find a blank wall that has an outlet and enough space to put it in. As you are building your frame, you will need to frame out your electric fireplace insert.
Do I need to follow code when doing a fireplace makeover?
Yes. If you are building around your existing fireplace you will need to look up the code for your area on fireplaces. When building ours, we had to make sure that the wood was a certain distance away from the fireplace.
The black around our gas fireplace is stone tile that gave us the exact distance we needed. These tiles were already there so we didn’t really need to do anything else.
If you are doing an electric insert, you can have wood right up to the file insert.
Supply list
- 2×4’s – the amount will vary depending on how big you make your frame.
- 1×3’s- the amount will vary
- Shiplap boards.
- Large board of your choice to line the inner part of the frame around the fire
- Miter saw
- Nail gun and air compressor
- Spackle paste
- Paint (whatever color you paint your Shiplap)
- Sander
- Drill and screws
Step one to creating your Shiplap fireplace makeover
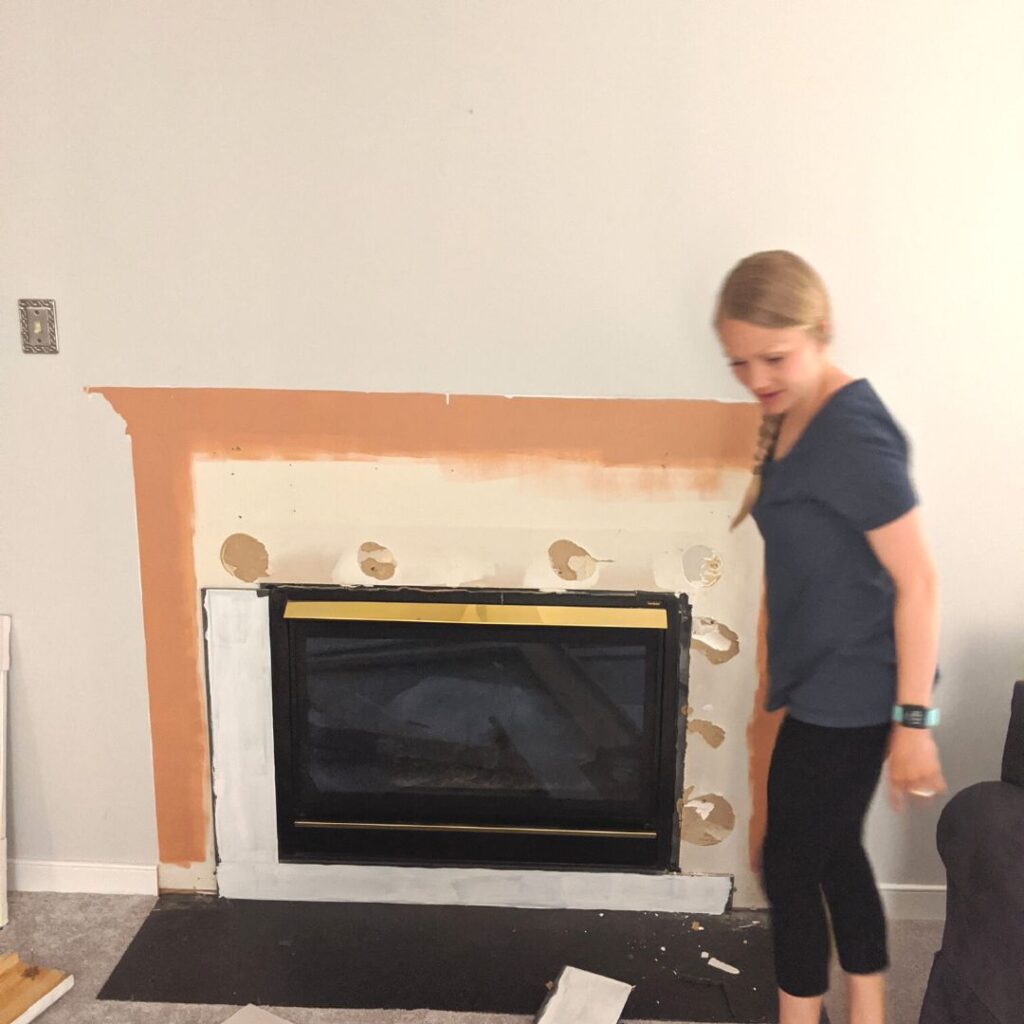
Clear the area and measure out how far out you want to build your frame. Make sure you look up your fire code rules for your area and take those measurements into account. If you are doing an electric insert measure the insert to use in the future.
Step two: Build the frame
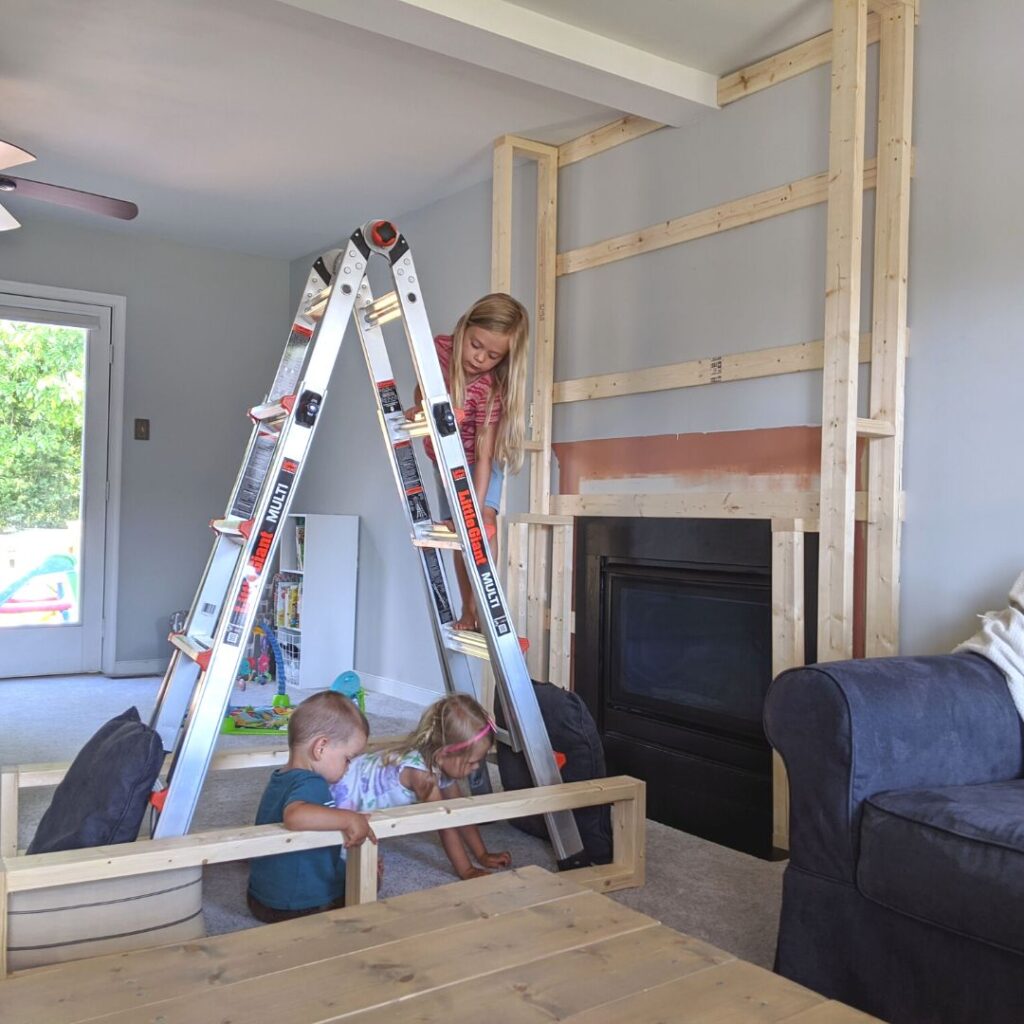
Find the studs on your wall in the area that you will be building. Screw the 1×3 boards into the studs. These are going to be what your screw your frame into. It is nice to have one of these every 1-2 feet.
Create the frame. I used long and short rectangles to create the frame of our fireplace makeover. We wanted our frame to stick out about 10 inches so that is how deep we made our frame. Make two long ones on each side and two short ones that are as tall as the fire place.
We did two really short ones that we placed where we planned on attaching the mantel to. This would make more places to secure the mantle to.

Then measure out how wide your boards need to be to line the inside of the fireplace. Screw those into place.
Step three: Install the shiplap boards
We started on the top of the fireplace and worked our way down. Because I didn’t want any trim along the edges of the fireplace we chose to miter the corners of the Shiplap boards to give them a sharp corner.
This is quite difficult and so if you want to just do a flat edge and purchase trim to cover the corners you can do that. We had a few gaps in between our mitered edges that I just filled with spackle and sanded to a sharp corner. It worked great and has lasted.
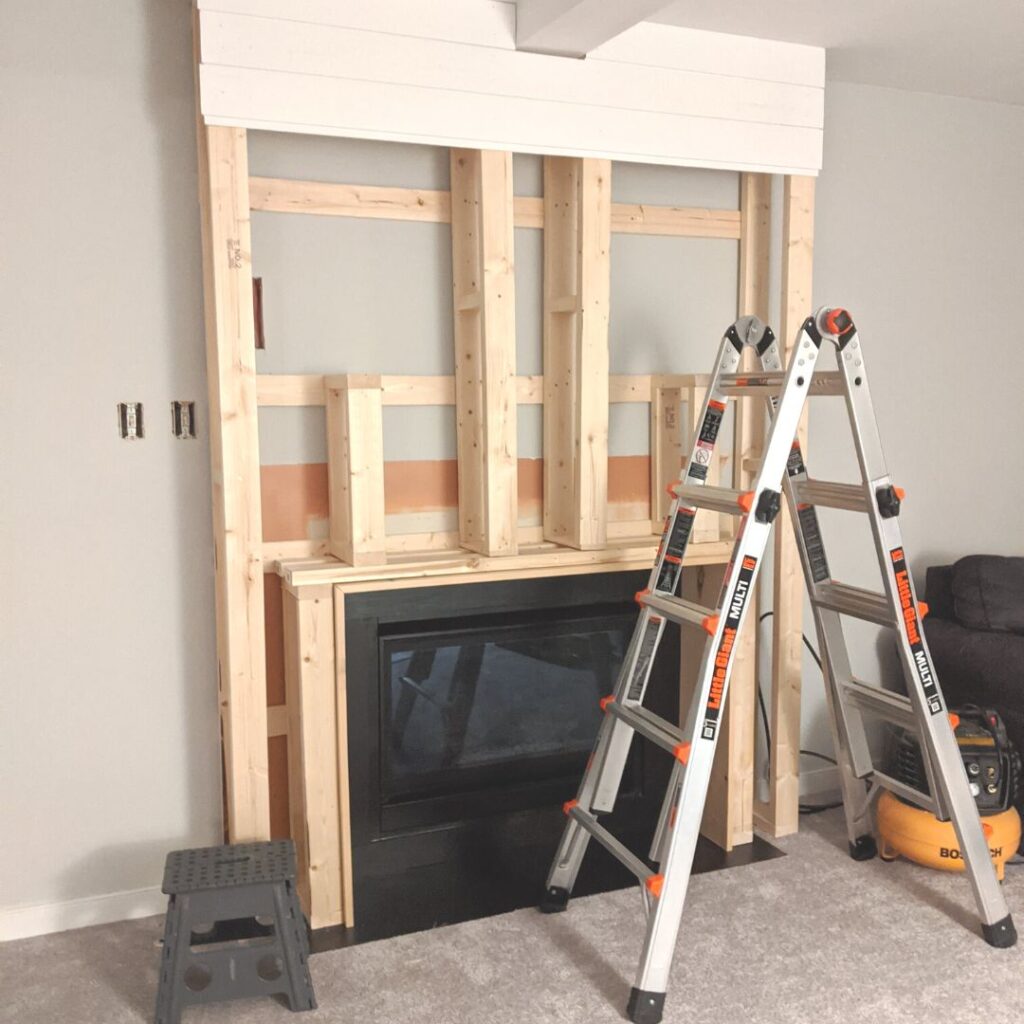
Step four: Add trim along the top
There will be a small gap along the top where your shiplap meets the ceiling. If that is the case you will want to add a thin piece of trim along the top. We had to work around a beam and added some trim around that. For the trim we just cut a scrap piece of shiplap into thin strips and used that.
The form you have selected does not exist.
Step five: Spackle and sand
Spackle the nail gun holes that are in the shiplap and trim. Once that spackle dries use your sander to sand your shiplap and wood smooth. This creates a mess so cover your furniture or remove it from the room.
Step six: Paint
Blow or vacuum of the dust from sanding and then paint your shiplap and wood. I would paint several coats to ensure the paint will last.
Step Seven: Attach a support board and mantel

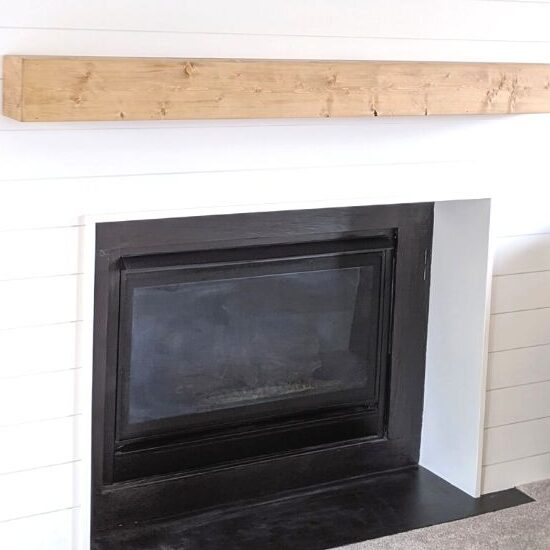
We made a faux wood mantel by nailing 1×6 boards with mitered ends together. There are only three sides with the back open. Then we capped the ends of the faux beam with a square with each edge mitered. that way we could stick it on the end with no seams showing.
It turned out really well. I also stained the mantle with weathered oak stain color.
Attach a support board to your fireplace. we marked where the frame was on the shiplap board above as we were going down so we knew where to drill into. Then stick your beam on with the open back against the shiplap. drill from the top of the mantel into the support board. You can use wood filler to cover the screws.

This was super strong and held up really well. We just love how it looks and feel like it was totally worth doing! Let me know in the comments below if you have any questions!
Check out other projects we have done, like this Free Mud Kitchen for kids!