

Soil Blocks for Seed Starting: Using A Capillary Mat
The best way to start seeds using soil blocks for seed starting and a capillary mat. Let’s dive in!

When I first heard of soil blocks, I thought they were a new thing! Nope. People have been blocking their seedlings for hundreds of years…
Ladbrooke Soil Blockers was made in England and brought to life in The United States by a man named Eliot Coleman. If you have read his book, New Organic Grower, you will have herd of soil blocks (I highly recommend that book).

Soil blocks have many benefits for home gardeners, that I will discuss later, but what first attracted me to them was that soil blocking could be done in a SMALL SPACE.
As you know, I am all about big plans in small spaces! They also were more environmentally friendly as you don’t need to buy plastic cell trays or plug trays every year!
What are soil blockers?
Soil block makers are a tool that you use to pack in wet soil and then push out little soil blocks for seed starting. They seem intimidating, but you will learn how to use them rather quickly.
The first year that I made my soil blocks it took me a minute to get the soil to the right wetness but after that it was super simple. And really, not hard to use AT ALL.
What are capillary mats?
A downside to soil blocks for seed starting is that they can dry out quickly. Last year I learned about capillary matting and wanted to give it a try. Capillary mats provide the right amount of water for your soil blocks.
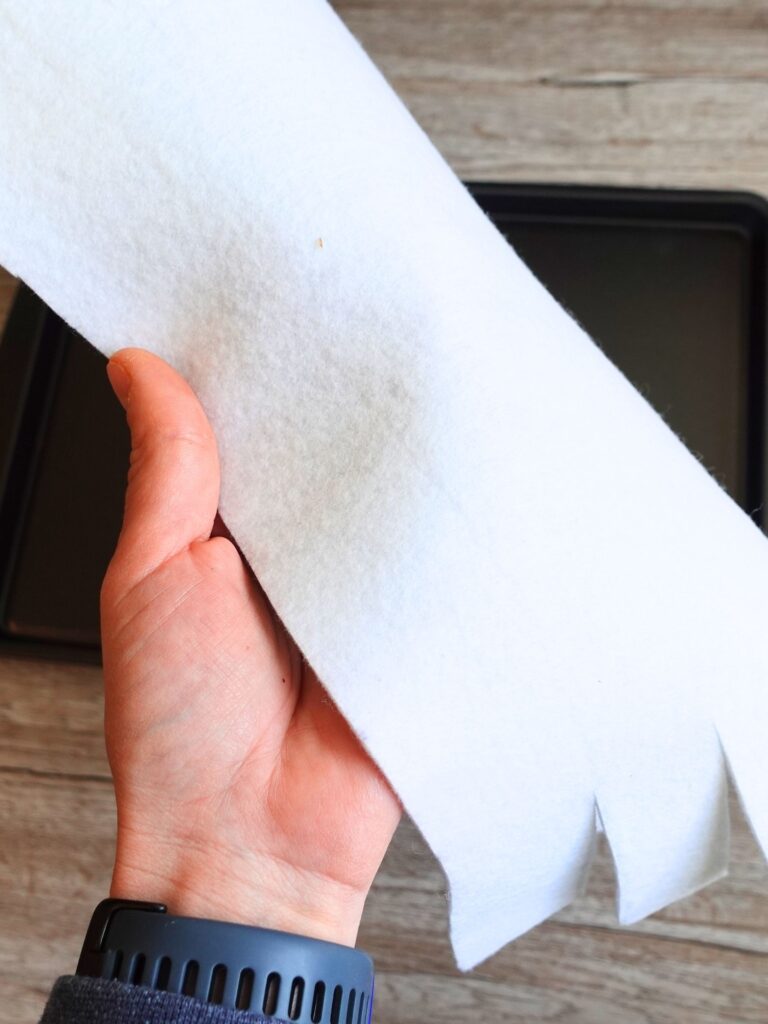
They feel al little like felt. When they are dipped into water, they absorb the water and pull it throughout the mat. By placing your soil blocks on the capillary mats, the soil blocks will absorb the water from the mat.
Soil blocks are supposed to be bottom watered meaning you pour water into the bottom of the tray and the block absorbs the water.
The block will only take in the amount of water that it needs. I live in the high desert and my reservoir of water isn’t very big, but I only have to fill it every few days (more when germinating seeds) for the soil blocks to stay moist.
Which means that I have to water them less. This is huge, because if you have ever had your soil block dry out and harden (ahem…), It is really hard to re-hydrate it again!
Soil Block Pro’s and Con’s
Pros:
- Encourage deep roots
- Air prune
- Reduces transplant shock
- Promotes air circulation
- Steady supply of water (when using capillary mat)
- Saves on space
- Eco-friendly (don’t need plastic trays or to replace plastic trays. Can use the same blocker year after year)
Cons:
- When using capillary mats, the roots will sometimes grow into the capillary mat. It’s not a huge deal and only happens when I have my plants indoors for too long
- They take a little more care when handling. You can’t grab them roughly or if they get dropped, they will break. It’s a little extra care, but not an overwhelming amount.
- I used to say that they dried out quickly, but that was until I found capillary mats!

Soil Block sizes
There are three different sizes of soil blockers.
- Mini Soil Blocks: These are 3/4 inch blocks and can punch out 20 mini blocks of soil out at a time. These are very small and can only allow for small seeds. The benefit of these is that you sow more seeds at one time in a small space. Then you can take your plants that have germinated and pot them up (discussed below). You will most-likely have to “pot up” these mini blocks after a few weeks of growing. Using a capillary mat for these blocks is especially helpful because they dry out even more quickly than the larger blocks. I personally skip using these mini blocks and go strait to the next size.
- 2-inch Soil Blockers: The 2-inch blocker is my favorite and most used soil blocker. If you only want to buy one soil blocker it should be this one. This has a row of four blocks that can be punched out. They have made 2 inch soil blockers with longer handles and eight blocks so that you can use while standing up. If you are producing large amounts of soil blocks you could consider that. I haven’t tried using that one.
- 4-inch Soil Blockers: These blockers will need to be punched on a large and sturdy tray. The only plants I would imagine that you use these for are plants like peppers or something that needs to be started indoors super early. I have not tried using this size of blocker with the capillary mat, but I imagine that it would work well for it also.
Potting Up Soil Blocks
Potting up means to move a plant that is in a small pot into a larger pot to allow the roots more space to grow. Soil blocks don’t have pots, but it’s the same idea.
The 3/4 inch blocker can fit into the 2 inch blocker and the 2 inch blocker can fit into the 4 inch blocker. You MUST HAVE the right pins inside the bigger blocker in order to fit the smaller blocker inside.

For example, If you have the two inch blocker, it comes with a pin inside that punches a hole into the soil block making a space for your seed. BUT if you are wanting to put your 3/4 inch soil blocks in your 2 inch, you need to remove the dome shaped pin and put the 3/4 inch square pin.
This pin will make it so that when you punch out your 2 inch soil blocks, it will leave a space large enough to fit the 3/4 inch soil block. The same goes for the 4 inch soil block. You may have to purchase your extra pins separately.
Soil mixes for making soil blocks
I have been asked, “do you need special soil to make soil blocks?” I had the same question at first. There were all these blog posts about the perfect soil block soil mix recipes and they were mostly just copying Eliot Coleman’s soil mix. I didn’t know what one to choose!
Anyway, I was super intimidated about making this mix, mostly because I didn’t want to have to source all of the ingredients it required. I REALLY LIKE TO KEEP THINGS SIMPLE in my life, and making that soil mix, wasn’t for me. But it may be for you.

Here are some soil mixes that are available and that work
- Eliot Coleman’s soil mix recipe (make your own)
- Johnny’s seeds has a seed starting mix that is pretty close to the Eliot Coleman’s soil mix
- Just a regular old bag of organic potting mix (THIS IS WHAT I USE AND IT WORKS GREAT) I know, I know…. you SHOULD use a “seed starting mix” to start seeds, but it is more expensive and I have used strait up potting mix and it works.
- Organic seed starting mix
Setting up your trays and capillary mats
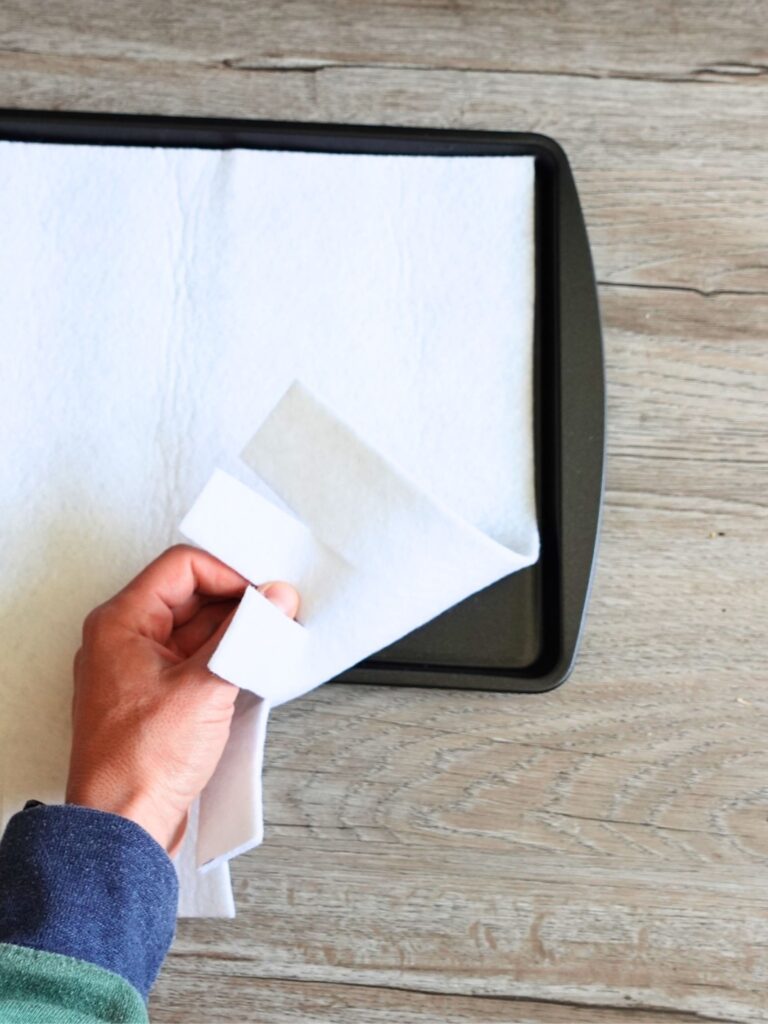
Before making your soil blocks, you will want to have your trays all set up and ready to go. I would go with a solid tray that isn’t too bendy.
I simply use these cheap cookie sheets and they work great. Think about your grow station and how big your shelf will be.
You don’t want to have a tray that is too big and wont fit on your shelf or under your grow lights. I used this wire shelf with these grow lights. I can fit three trays per shelf.
Under your tray you will need to put a larger tray or water basin of some kind that the capillary mat can hang over the tray and dip into the water reservoir.
If you aren’t using capillary mats you can skip this step. Then cut your mats to the size of your tray with one side several inches longer. Long enough to reach down into the water reservoir.
How to make soil blocks
Actually making the soil blocks is super simple. It can be messy so making them outside might be preferred, but I make them indoors all the time. You just need a flat surface to work on. Before getting started make sure that you have prepared your trays and capillary mats.

- First step: Fill your bin, tub, or wheel barrow(for making large amounts) with your soil. I wouldn’t go over 3/4 full.
- Second step: Add water to your tub and soil. As it is filling with water, mix the soil around. I was surprised at how much water I actually needed to make the soil block. You will want water to ooze out of your hand when you squeeze a handful of soil. If you are left with a ball of soil in your hand after squeezing then the soil is probably wet enough.
- Third step: Press your soil block makers into the soil shifting the sides back and forth. You can watch my Youtube video to get a better idea of what I mean by shifting. Then I tilt the soil bock and scoop a little more soil under the blocker, press down and shift the sides back and forth again. For the best results make sure that you have pressed as much soil as you can into the blocks, really packing it in there.
- Fourth step: Line up your soil blocker onto the tray and press the soil blocks out. You can put them pretty close together.
- Fifth step: place your tray over the water basin and fill the basin with water. Dip the capillary mats into the water. It took my mats a few hours for the water to reach back of the mat. After that it will remain moist from the water in the basin.
How to transplant soil blocks
So like seedlings that are grown indoors in seed trays, your soil blocks will also need to be hardened off before planting them in your garden. HARDENING OFF plants is a process of getting your indoor plants used to the outdoors.

First take your plants and set them outside for 1-2 hours and then bring them back in. Increase the time they spend outside a little more each day.
I tend to rush this part a bit and get the plants completely hardened off by a week, but some people do it over a period of two weeks.
If you are going to have an unusually cold/snowy day don’t take them outside. OR if it is going to be pouring rain, the soil blocks will get obliterated in pouring rain, so don’t take them out then unless you have some type of cover over them.
I don’t bring the water basin outside, just the trays with the capillary mats.
What seeds can you plant in your soil blocks?
You can use veggie seeds, flower seeds, or any seeds that aren’t too big. Your only limitation is the size of your soil block, other than that, you can plant any seed!
Soil blocks with capillary mats troubleshooting

- Seedlings not growing? Are you starting your seedlings in a cold place? Some seedlings, like pepper plants, need it warmer to germinate. Some people use heat mats to warm their trays. You could also add warm water into the reservoir. I have used a space heater in the seed starting room for a few days while my pepper plants germinate too.
- Some first time growers and soil block uses take a few minutes to get the right water to soil consistency for the soil blocks. If your blocks are falling apart or crumbly then you should add more water. I have found that it is better to error on the side of too much water than not enough.
Supplies I use

- 2 inch soil blocker
- capillary mat
- metal shelf
- LED shop lights (cheaper and just as effective as “grow lights”)
- organic potting soil
Other gardening tips!
Pruning tips to keep your fruit tree small
Hi I just found this post. Thanks! I share your enthusiasm for soil blocks on capillary mats. Let me share this with you: I have learned that putting my blocks onto a ‘carrier’ mat works best. I have some non-woven landscape fabric that likes water. I cut small pieces of this (a piece of polyester fleece or probably an old tee shirt would work as well) and squeeze out my soil blocks directly on it. Then, when I’m ready – usually 8 or 16 blocks- I move the whole works over onto the wet capillary pad. I use an old auto license plate as my carrier tool to move them. A drywall knife works, too. Just slide off the carrier and blocks onto the wet capillary mat. When it is time to move the little plants, if they have rooted through the mat, I can cut them loose without damage. Sometimes, I cut the block and leave the little piece of carrier mat attached, and in the garden it goes. Plain old Pro Mix is my go-to. I do add some of my own garden soil to it to help it hold together. Cheers!
Those are great tips! Thanks for sharing!