

Build a Rabbit Hutch Using KW Cages: FREE Plans
My favorite way to build a rabbit hutch using KW cages WITH VIDEO (below)

Whether you’re giving your rabbit hutch a new look or you are starting from scratch, these free rabbit hutch plans will give you a great start to your rabbitry.
It always helps to have some detailed plans to prevent this project from drawing out for a long time! If you are accustomed to projects, you know what I mean!
This project took us two half days to complete, and that is with our kids around and helping. These plans are for an outdoor hutch where the rabbit droppings will fall through the floor onto the ground. We then use those fertilizer pellets (aka poop) in our garden!
What are KW Cages?
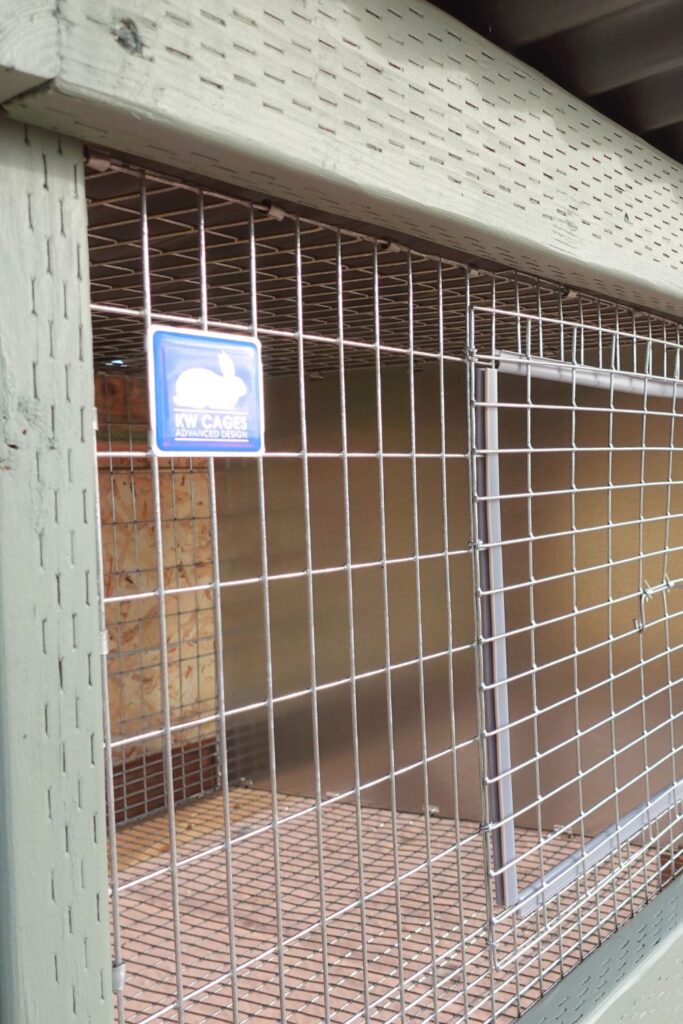
KW cages are a brand of wire cages that you can purchase from this website. There are many different types of cages that you can choose from. You can find other supplies that are also sold on their website like: hay feeders, water bottles, water bowls, etc.
These cages come coated and with the supplies that you need to put the cages together. When your KW package arrives, it comes in a box that has the sections of the cages in the boxes.
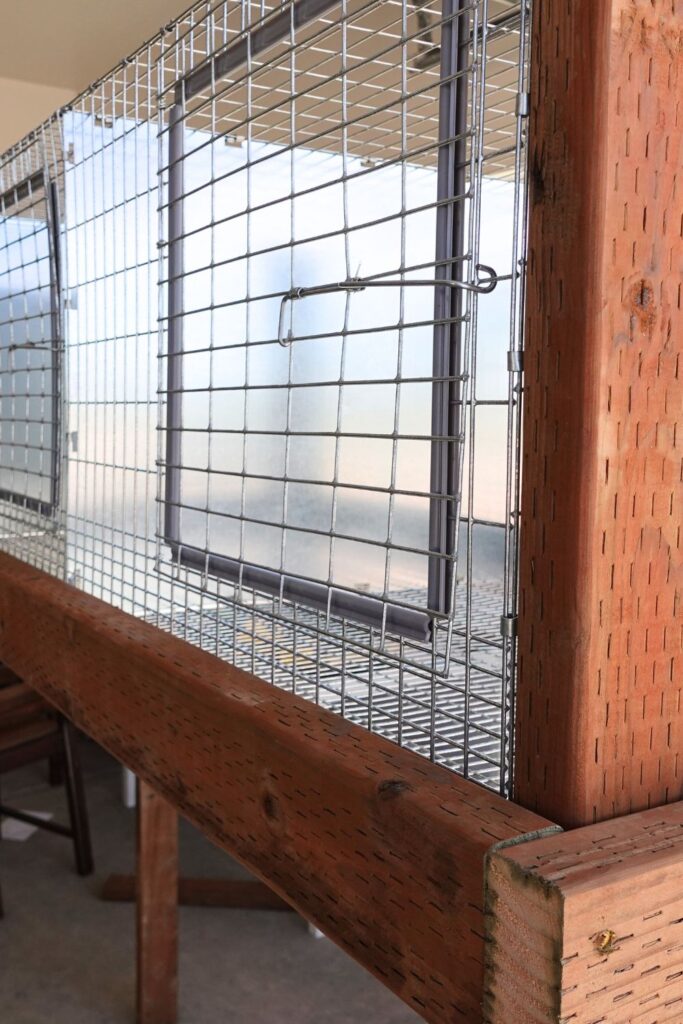
You assemble the cages using metal clamps that you need specific crimping tool for clamping the wire sides together.
I just purchased the cheaper option on the KW website for the crimper and it worked great.It took me a few minutes to assemble a trio cage together.
I am not sponsored by KW cages, but I do like their products and would suggest them to you.
Pro’s of a KW cage
- Baby saver options (smaller wire mesh at the bottom of the cages that prevent any baby rabbits from slipping through)
- Easier access to the rabbits (has large doors and opening with rubber lining the door to prevent scratching your arms when you reach in)
- Can be used for smaller rabbits or larger rabbits
- Easier option than bending your own wire
- Large area inside the cage
- Can purchase hutch sections that are solid which lowers any territorial issues.
- Can purchase multiple sections that become one cage with multiple doors (that is what we have, a trio of cages that are all one piece)
- Coated wire that can withstand the acid from rabbit urine
- Durable and sturdy
Con’s of a KW Cage
- Your rabbit’s cage has to be specific to their dimensions
- A little large up front cost that buying your own wire (but not by much, honestly)
- Needs to be assembled (again, it isn’t hard to put together but you do have to assemble it)
Materials I used to build my rabbit hutch with a trio rabbit hutch

This material list is for cage dimensions of 72″x24″x18″. I purchased my materials at my local hardware store, but I am listing some links here to help you get a vision for what we used. These links are affiliate links and I may earn a small commission from them at no extra cost to you.
- 8 -2″x4″x8′ I used pressure treated wood for ground contact because our hutch was going to be exposed to the ground and other elements.
- 2- 1″x2″x8 (this piece we couldn’t get pressure treated, so I stained it)
- 2 1/2″ wood screws
- Exterior Paint (more for decorative purposes, but if your wood isn’t pressure treated, then YOU WILL WANT TO STAIN YOUR WOOD) I used SW RETREAT for my paint color.
- Plastic panels for roofing
- Siding panels. I would use whole pieces for the panels instead of the individual boards. (also optional, we are doing them because we have long winters and mild summers. If you live somewhere hot and humid, you won’t want siding panels. Ventilation is very important for rabbits’ health during the summer time. We plan on doing some ventilation openings in the back that we will open up during the summer, but that can be closed in the winter).
Tools I used
- Impact driver
- Miter Saw
- Skill Saw
- Measuring Tape
- Paintbrush
- Strong scissors
How to build a rabbit hutch using KW cages
This DIY rabbit hutch is super easy and doesn’t need more than a weekend to put together. And it looks good too!
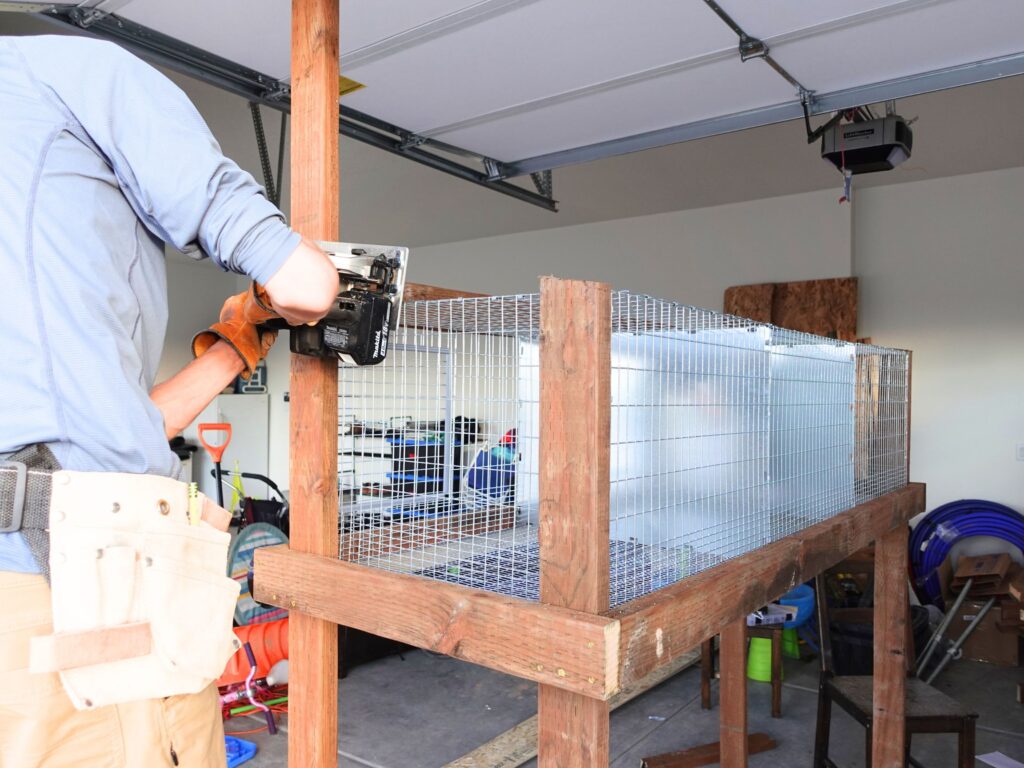
Step One

Assemble you wire mesh KW cages. Even though I knew the dimensions of the cages, It was still nice to use the cage to measure out boards and double check that the boards would fit properly.
Step Two
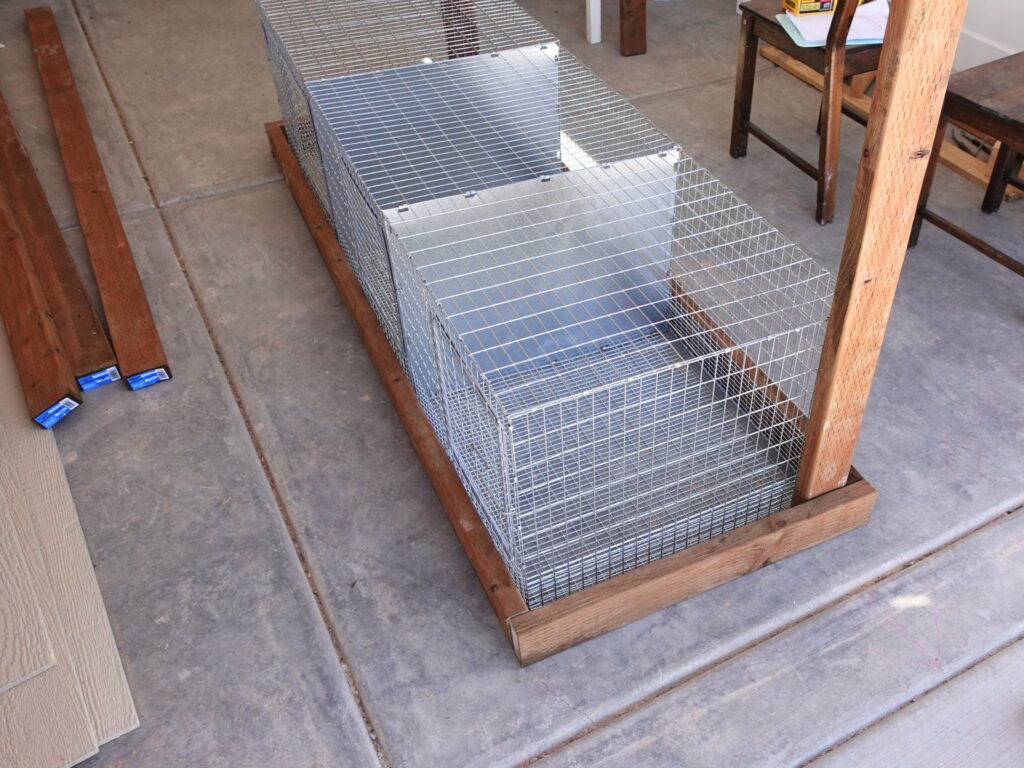
Using your 2×4’s cut pieces to assemble your lower frame. Measure how long the front of your frame should be as well as the back.
It is a good idea to use use the front legs and back legs as place holders around your cage when you measure.
We wanted our legs to be on the inside of the hutch and for the legs to run all the way up the frame. So having the legs there when you measure how long to make the top and bottom frame pieces is helpful. We were able to use the extra pieces of the 2×4’s for the sides of our boards.
Step Three

Once you have the base of your frame, measure where on the leg pieces you want the base of your frame to go and secure the legs to the frame.
We made our rabbit hutch legs longer because we are putting the legs into the ground so the wind can’t blow our hutch away. We live in a very windy location! So that is why our hutch looks so tall.
Step four

Cut the long skinny 1″x2″ board to fit along the inside of the long boards of the hutch. This will be the ridge that the hutch sits on.
Step Five
Put your wire KW cage onto the ridge inside the hutch. Make the top of your frame with two long boards on the front with the front board higher up than the back. Having this angle will make it so that water will run off of the roof.
Step SIX

Add support Boards at an angle from the front base of the hutch down to the leg. We did this on the front of the hutch as well as the back. Cut the boards at an angle with your miter saw.
Step Seven
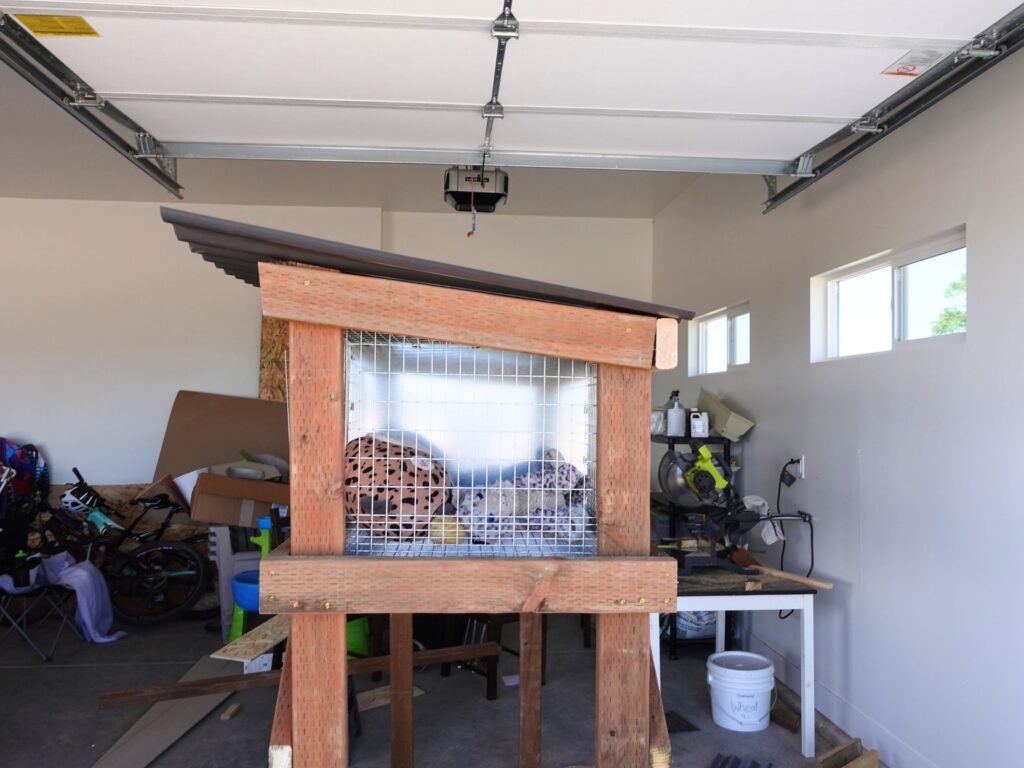
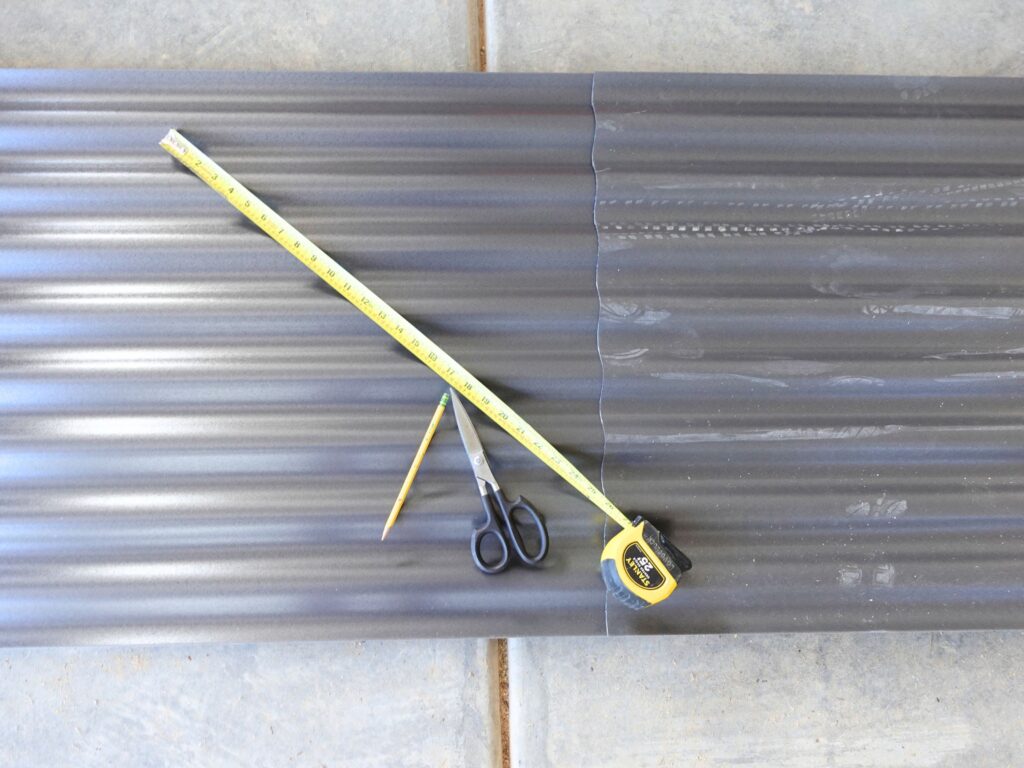
Measure and cut the roof panels so that they hang 2-4″ off of the side and back and 8-10″ off of the front. Drill your roof panels into the top frame of the hutch.
Make sure that NONE of your screws are jutting through the wooden frame and into the rabbit cage. You don’t want your rabbit accidentally getting cut on the screws.
Step Eight
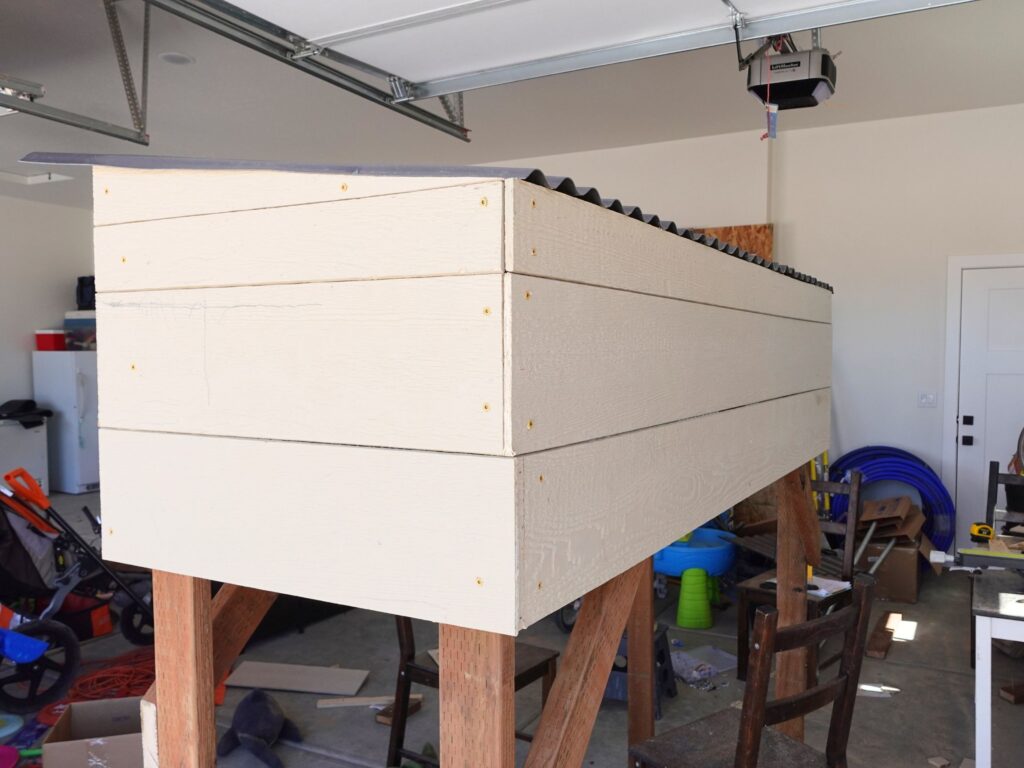
Optional: add side panels. This is if you live in a colder climate. We do and most of the year it is cool enough that the rabbits will be fine.
We have a few months in the summer where it will occasionally get above 90 degrees. Those temperatures are hard on rabbits! So we will add ventilation openings in the back and attach solar panel fans to the front. If you live somewhere humid, you might want to leave out the side panels.
If you have humidity and heat in the summer, but still cold winter, you can add temporary plastic coverings on the sides of your hutches and your rabbits will be just fine.
Step Nine

Optional: Paint the hutch. We wanted to paint the top frame of the hutch and leave the front and hind legs bare. I really like how it looks!
Let me know how you like your rabbit hutches!
Rabbits and wire floors

There is some controversy on whether rabbits should stand on wire bottoms. There are a few things to consider. KW cages all have wire that is close enough together that it won’t cause sore feet.
Also, we add a little resting pad (tile in the summer-cools them down) that they can stand on and it gives them a break. But I have never had a problem with this.
Guinea pigs will get sore feet from wire bottoms and maybe people think it is the same for rabbits, but NO, it isn’t. Wire floors are cleaner and make it so that the rabbits aren’t standing in their pee and poo all day.
Outdoor rabbits
These plans are for an outdoor hutch and so are these specific KW cages that I suggest. I believe that the KW cages website has indoor bunny hutches as well, but our rabbits are livestock, not pets.
So we don’t have things like a litter box (their feces goes on the ground and we use it in our garden), pet play pen, litter pan, etc. We don’t litter train our rabbits.
Are rabbits social animals?
Yes and no… They like social interaction, but females can sometimes get territorial when together. And well, if you have a male and female together… you get babies.
So that is why it is suggested to have rabbits in separate parts of the cage but in cages together. If you have two females together, they can be happy together if they are friendly and have enough space to live. For example in a colony.
Raising meat rabbits
We chose to raise meat rabbits because we have a micro-homestead of sorts here in the high desert. We make big plans in small spaces and raising our own meat is a big plan, and rabbits help us do it in small spaces. They are not a lot of work and perfect for our homestead family.
In the future
We are currently working on growing a pasture just for our grow out rabbits. We will build a rabbit tractor of sorts and allow them to graze on that and save on feed costs. More on that in the future!
I hope you enjoyed your free rabbit hutch plans